Nextcloud 무작정 설치하기
Nextcloud는 자체 클라우드 (오픈 소스) Dropbox와 유사한 소프트웨어입니다. Nextcloud는 PHP와 JavaScript로 작성되었으며 MySQL/MariaDB, PostgreSQL, Oracle Database 및 SQLite와 같은 많은 데이터베이스 시스템을 지원하고 있습니다. 서버간에 파일을 동기화하기 위해 Nextcloud는 Windows, Linux 및 Mac 데스크톱 용 애플리케이션과 Android 및 iOS 용 모바일 앱을 제공하여 사용도 하고 있습니다. Nextcloud는 단순한 드롭 박스 복제가 아니라 캘린더, 연락처, 일정 작업 및 Ampache를 사용한 스트리밍 미디어와 같은 추가 기능을 제공합니다.
전제 조건
- CentOS 7 64 비트
- 서버에 대한 루트 권한
1단계 Nginx 및 PHP7-FPM 설치
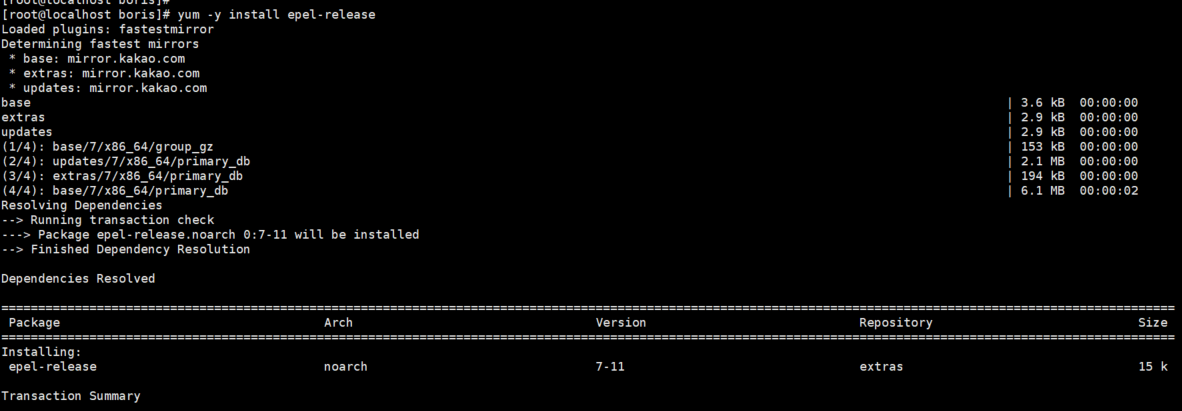
Nginx 및 php7-fpm 설치를 시작하기 전에 EPEL 패키지 저장소를 추가하여야 합니다. yum 명령으로 설치해주세요.
- yum -y install epel-release
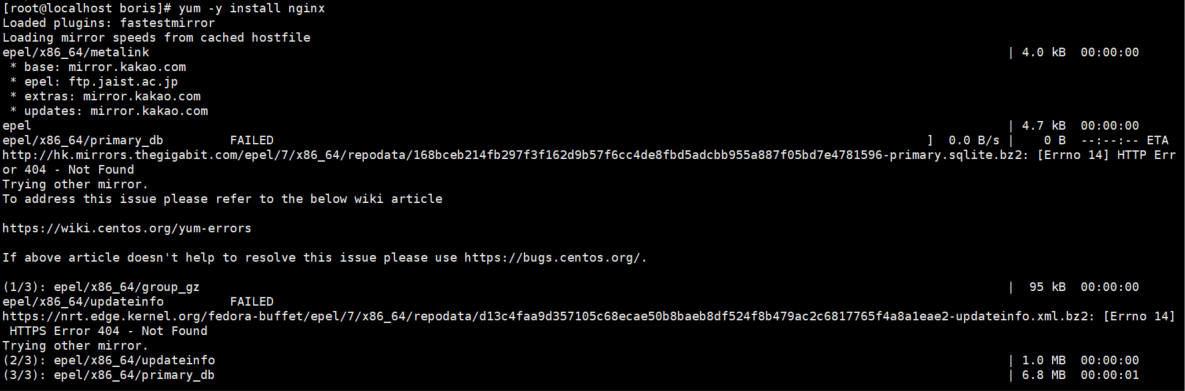
EPEL 저장소에서 Nginx를 설치하십시오.
- yum -y install nginx
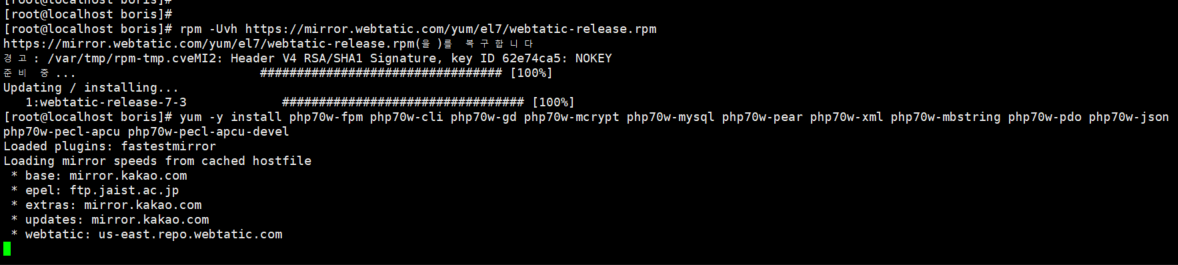
PHP7-FPM 웹 저장소를 추가하여 설치를 계속 진행합니다.
- rpm -Uvh https://mirror.webtatic.com/yum/el7/webtatic-release.rpm

다음 Nextcloud 설치를 위해 PHP7-FPM 및 일부 추가 패키지를 설치하십시오.
- yum -y install php70w-fpm php70w-cli php70w-gd php70w-mcrypt php70w-mysql php70w-pear php70w-xml php70w-mbstring php70w-pdo php70w-json php70w-pecl-apcu php70w-pecl-apcu-devel
마지막으로, 서버 터미널에서 PHP 버전을 확인하여 PHP가 올바르게 설치되었는지 확인하십시오.

2단계 PHP7-FPM 구성
Nginx와 함께 실행되도록 php-fpm을 구성합니다. Php7-fpm은 사용자 nginx에서 실행되며 포트 49000에서 수신 대기합니다. vim으로 기본 php7-fpm 구성 파일을 편집을 합니다. 일전에 어떤분이 왜 포트 49000으로 하냐고 물어보신 분이 있으신데 그냥 제가 테스트 할 때 보안성을 생각하여 4만 때 포트를 사용하고 있을 뿐입니다. 포트 변경은 편하신 포트 사용하시면 됩니다.
주의 사항
#으로 되있는것은 삭제하셔야 됩니다.
- listen에 0.0.0.0:49000으로 변경해주세요.


다음 '/var/lib/'디렉토리에 세션 경로에 대한 새 디렉토리를 만들고 소유자를 'nginx'사용자로 변경하여 줍니다.
- mkdir -p /var/lib/php/session
- chown nginx:nginx -R /var/lib/php/session/

php-fpm 및 Nginx를 시작하여 주세요.
- systemctl start php-fpm && systemctl enable php-fpm
- systemctl start nginx && sudo systemctl enable nginx
3단계 Mariadb 구성
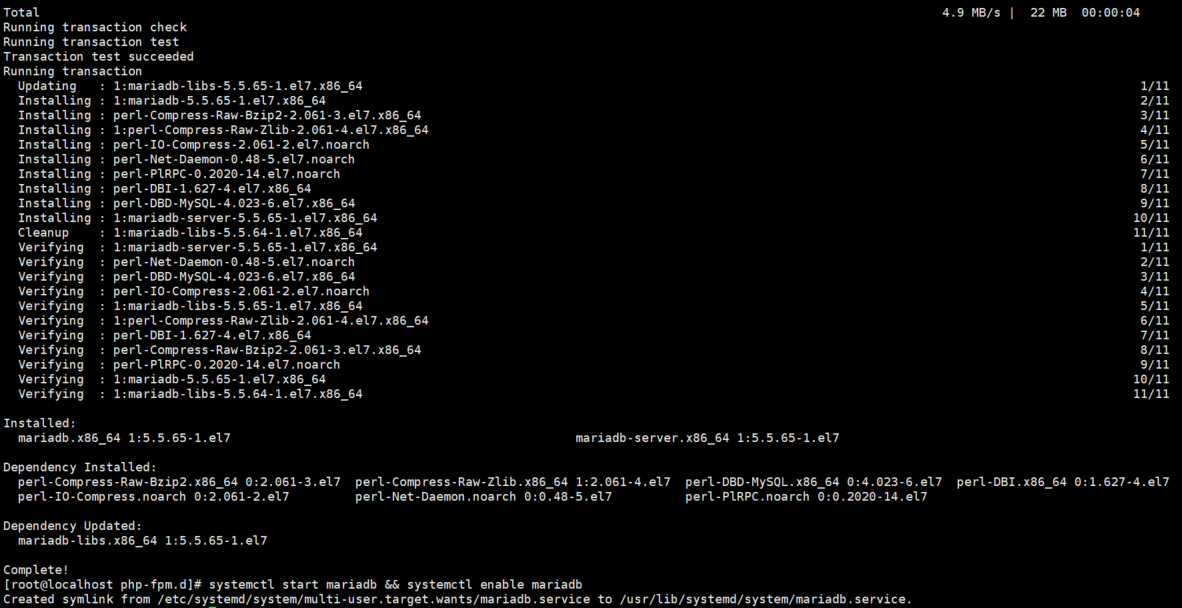
Nextcloud 데이터베이스에 MariaDB를 사용하겠습니다. yum을 사용하여 mariadb-server패키지를 설치하도록 하겠습니다. Mariadb를 사용하는 이유는 뭐 결국에 오픈소스를 구성하면서 mysql을 사용하기는 좀 이상하다고 생각해서 마리아 디비로 진행하도록 하겠습니다.
- yum -y install mariadb mariadb-server
- systemctl start mariadb && systemctl enable mariadb
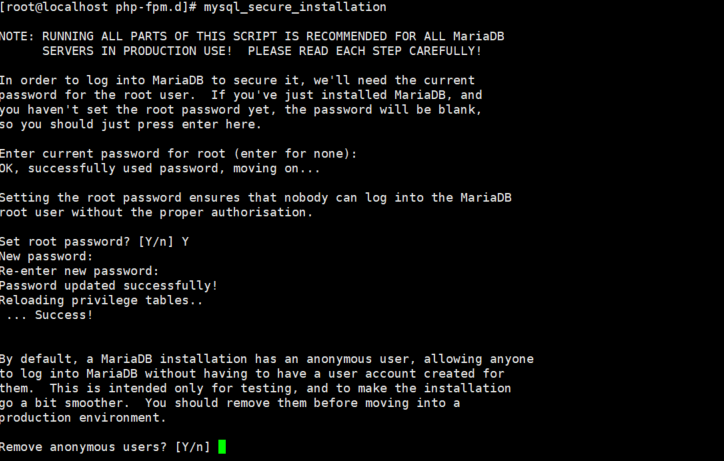
이제 MariaDB 루트 비밀번호를 구성해주세요.
- mysql_secure_installation
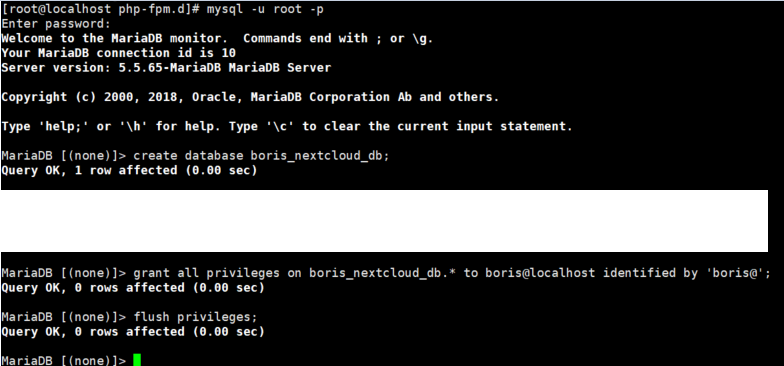
mysql 셸에 로그인하여 Nextcloud의 데이터베이스와 사용자를 만들 수 있습니다. 'boris_nextcloud_db' 라는 새 데이터베이스 와 'borisnextclouduser'사용자를 만듭니다.
- create database boris_nextcloud_db;
- create user boris@localhost identified by 'boris@';
- grant all privileges on boris_nextcloud_db.* to boris@localhost identified by 'boris@';
- flush privileges;
4단계 NextCloud에 자체 서명된 SSL 인증서 생성
자체 서명 된 SSL 인증서를 openSSL을 사용할 수 있습니다. OpenSSL 명령을 사용하여 자체 서명 된 SSL 인증서 파일을 만들어 줍니다.
- mkdir -p /etc/nginx/cert/
- openssl req -new -x509 -days 365 -nodes -out /etc/nginx/cert/borisnextcloud.crt -keyout /etc/nginx/cert/borisnextcloud.crt

5단계 NextCloud 다운로드 및 설치
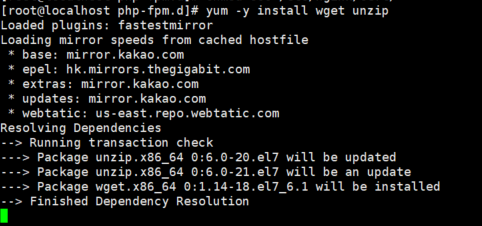
wget이 포함 된 Nextcloud를 서버에 직접 다운로드하므로 wget을 먼저 설치해야합니다. 또한 압축 해제 프로그램이 필요합니다. yum으로 프로그램을 모두 설치해주세요.
- yum -y install wget unzip
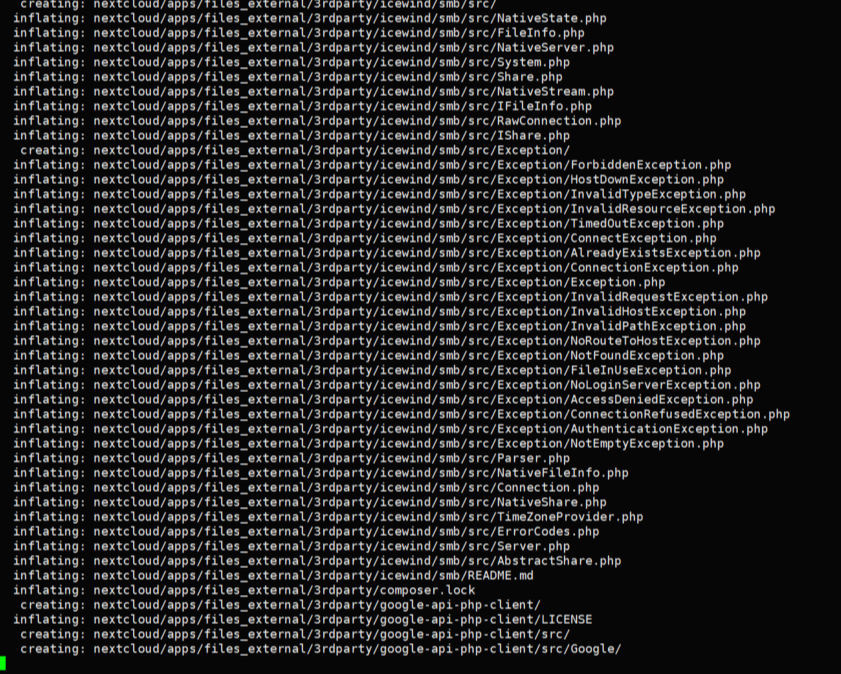
wget을 사용하여 Nextcloud 웹 사이트에서 최신의 안정적인 Nextcloud 10 버전을 다운로드하십시오.
- wget https://download.nextcloud.com/server/releases/nextcloud-10.0.2.zip

- unzip nextcloud-10.0.2.zip
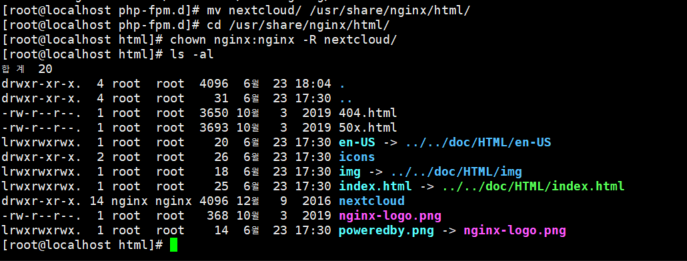
해당 파일을 이제 엔진엑스 html로 이동하여 줍니다.
- mv nextcloud/ /usr/share/nginx/html/
- cd /usr/share/nginx/html/
'nextcloud'디렉토리의 소유자를 'nginx'사용자 및 그룹으로 변경하십시오.
- chown nginx:nginx -R nextcloud/
6단계 Nginx에서 NextCloud 가상 호스트 구성
Nextcloud 가상 호스트를 구성해야합니다. Nginx 'conf.d'디렉토리에 새 가상 호스트 구성 파일을 작성하고 설정하여야 정상적으로 nextcloud를 실행시킬 수 있습니다.
- cd /etc/nginx/conf.d/
- vim borisnextcloud.conf
내부에 내용을 추가해서 만들어 주세요.
upstream php-handler {
server 0.0.0.0:49000;
}
server {
listen 80;
# enforce https
return 301 https://$server_name$request_uri;
}
server {
listen 443 ssl;
ssl_certificate /etc/nginx/cert/borisnextcloud.crt;
ssl_certificate_key /etc/nginx/cert/borisnextcloud.key;
# Add headers to serve security related headers
# Before enabling Strict-Transport-Security headers please read into this
# topic first.
add_header Strict-Transport-Security "max-age=15768000;
includeSubDomains; preload;";
add_header X-Content-Type-Options nosniff;
add_header X-Frame-Options "SAMEORIGIN";
add_header X-XSS-Protection "1; mode=block";
add_header X-Robots-Tag none;
add_header X-Download-Options noopen;
add_header X-Permitted-Cross-Domain-Policies none;
# Path to the root of your installation
root /usr/share/nginx/html/nextcloud/;
location = /robots.txt {
allow all;
log_not_found off;
access_log off;
}
# The following 2 rules are only needed for the user_webfinger app.
# Uncomment it if you're planning to use this app.
#rewrite ^/.well-known/host-meta /public.php?service=host-meta last;
#rewrite ^/.well-known/host-meta.json /public.php?service=host-meta-json
# last;
location = /.well-known/carddav {
return 301 $scheme://$host/remote.php/dav;
}
location = /.well-known/caldav {
return 301 $scheme://$host/remote.php/dav;
}
# set max upload size
client_max_body_size 512M;
fastcgi_buffers 64 4K;
# Disable gzip to avoid the removal of the ETag header
gzip off;
# Uncomment if your server is build with the ngx_pagespeed module
# This module is currently not supported.
#pagespeed off;
error_page 403 /core/templates/403.php;
error_page 404 /core/templates/404.php;
location / {
rewrite ^ /index.php$uri;
}
location ~ ^/(?:build|tests|config|lib|3rdparty|templates|data)/ {
deny all;
}
location ~ ^/(?:\.|autotest|occ|issue|indie|db_|console) {
deny all;
}
location ~ ^/(?:index|remote|public|cron|core/ajax/update|status|ocs/v[12]|updater/.+|ocs-provider/.+|core/templates/40[34])\.php(?:$|/) {
include fastcgi_params;
fastcgi_split_path_info ^(.+\.php)(/.*)$;
fastcgi_param SCRIPT_FILENAME $document_root$fastcgi_script_name;
fastcgi_param PATH_INFO $fastcgi_path_info;
fastcgi_param HTTPS on;
#Avoid sending the security headers twice
fastcgi_param modHeadersAvailable true;
fastcgi_param front_controller_active true;
fastcgi_pass php-handler;
fastcgi_intercept_errors on;
fastcgi_request_buffering off;
}
location ~ ^/(?:updater|ocs-provider)(?:$|/) {
try_files $uri/ =404;
index index.php;
}
# Adding the cache control header for js and css files
# Make sure it is BELOW the PHP block
location ~* \.(?:css|js)$ {
try_files $uri /index.php$uri$is_args$args;
add_header Cache-Control "public, max-age=7200";
# Add headers to serve security related headers (It is intended to
# have those duplicated to the ones above)
# Before enabling Strict-Transport-Security headers please read into
# this topic first.
add_header Strict-Transport-Security "max-age=15768000;
includeSubDomains; preload;";
add_header X-Content-Type-Options nosniff;
add_header X-Frame-Options "SAMEORIGIN";
add_header X-XSS-Protection "1; mode=block";
add_header X-Robots-Tag none;
add_header X-Download-Options noopen;
add_header X-Permitted-Cross-Domain-Policies none;
# Optional: Don't log access to assets
access_log off;
}
location ~* \.(?:svg|gif|png|html|ttf|woff|ico|jpg|jpeg)$ {
try_files $uri /index.php$uri$is_args$args;
# Optional: Don't log access to other assets
access_log off;
}
}
해당 내용을 넣고 nginx -t 명령어를 이용하여 정상적으로 작동하는지 확인해주세요.

이상이 없으면 nginx를 재시작해주세요.
7단계 NextCloud에 Firewalld 구성
- firewall-cmd --permanent --add-service=http
- firewall-cmd --permanent --add-service=https
- firewall-cmd --permanent --add-port=49000/tcp
- firewall-cmd --reload
모든 서버 구성이 완료되었습니다.
8단계 NextCloud에 설치마법사
사진이 중간에 한번 날라가서 제대로 다 보여드리지 못한점 죄송하게 생각합니다..
참고문헌


댓글
댓글 쓰기